Suminagashi: Paper Marbling Activity
 The Manga Club at the Hopewell Branch of the Mercer County Library System loves to sit back and watch
 a good anime and discuss the most recent manga members are reading. Every so often, however, our weekly meeting revolves around a slice of Japanese culture outside the manga and anime world. One of our most recent endeavors involved trying our hands at suminagashi (pronounced sue-me-nah-GAH-she), a paper marbling technique believed to have originated in Japan as early as the 12th century1.
Preparation was relatively low stress. The most difficult part was getting the right ink and doing a quick search on the Internet made it down right easy.
Technique #1
Supplies:
•Ink (I have used ink from the Boku-Undo Suminagashi Marbling Kit)
•Water
•Paint brushes
•Water color mixing tray, or individual small containers to hold each color ink.
•Shallow tray/pan/tub
•Paper (I have used regular computer paper, rice paper, and block printing paper)
•Paper towels
•Newspaper (optional)
•Photo-Flo (optional)
Overall Preparation:
•Place newspaper or some other protective layer down over your work space.
•Fill the tray with one to two inches of water.
•Place some paper towels down for yourself to be ready to blot off the excess water from your marbled paper.
Ink Preparation:
•Put a half to one teaspoon of each color of the ink into its own well of your mixing tray. For each color, you will want to use a separate brush so colors are not unintentionally mixed.
•(Optional) In one well of the mixing tray, mix one drop of Photo-Flo with one teaspoon of water. This solution can be used as “invisible ink,” or “clear spaces” between your ink colors.
Design Creation:
•Mix one brush into the color with which you would like to start; mix another brush into the “invisible ink” solution (or another color). With one brush in each hand, touch the tip of the brush dipped in color to the surface of the water. Next, touch the tip of the brush with “invisible ink” (or another color) in the middle of the color you have just applied to the water-filled tray. Alternate between brushes until you have created a number of rings to your liking.
•At this point, you can form your design either by gently blowing on the surface of the water, lightly tapping the sides of the tray, or fanning the water to create “currents.”

Print Making:
•Carefully lay a piece of paper flat onto the surface of the water. The ink will immediately transfer to the paper.
•Take the paper out of the water and lay it (ink side up) on paper towels to dry. You can use additional paper towels to carefully blot the ink side of the paper.
•A strip of newspaper skimmed over the top of the water can be used to clean the water surface for your next design.
Technique #2
Supplies:
•Ink (I have used ink from the Boku-Undo Suminagashi Marbling Kit)
•Paper dots (We used the paper dots included in the Boku-Undo Suminagashi Marbling Kit)
•Water
•Shallow tray/pan/tub
•Paper (I have used regular computer paper, rice paper, and block printing paper.)
•Paper towels
•Newspaper (optional)
•Toothpicks (optional)
Overall Preparation:
•Place newspaper or some other protective layer down over your work space.
•Fill the tray with one to two inches of water.
•Place some paper towels down for you to be ready to blot off the excess water from your marbled paper.
Design Creation:
•Place the number of paper dots you wish to use in the tray of water. Space the dots out, so they are not too close to each other. The paper dots are used to keep the ink on the surface of the water, as well as to facilitate its spreading over the water.
•You will create your design by placing a drop of ink from the bottle directly onto the paper dot. You can keep adding color, just make sure to get the drops of ink directly onto the paper dots.
•At this point, you can form your design either by gently blowing on the surface of the water, carefully tapping the sides of the tray, very lightly running a toothpick through the ink, or fanning the water to create “currents.”

Print Making:
•Carefully lay a piece of paper flat onto the surface of the water. The ink will immediately transfer to the paper.
•Take the paper out of the water and lay it (ink side up) on paper towels to dry. You can use additional paper towels to carefully blot dry the ink side of the paper.
•A strip of newspaper can be skimmed over the top of the water to clean your water surface for your next design.
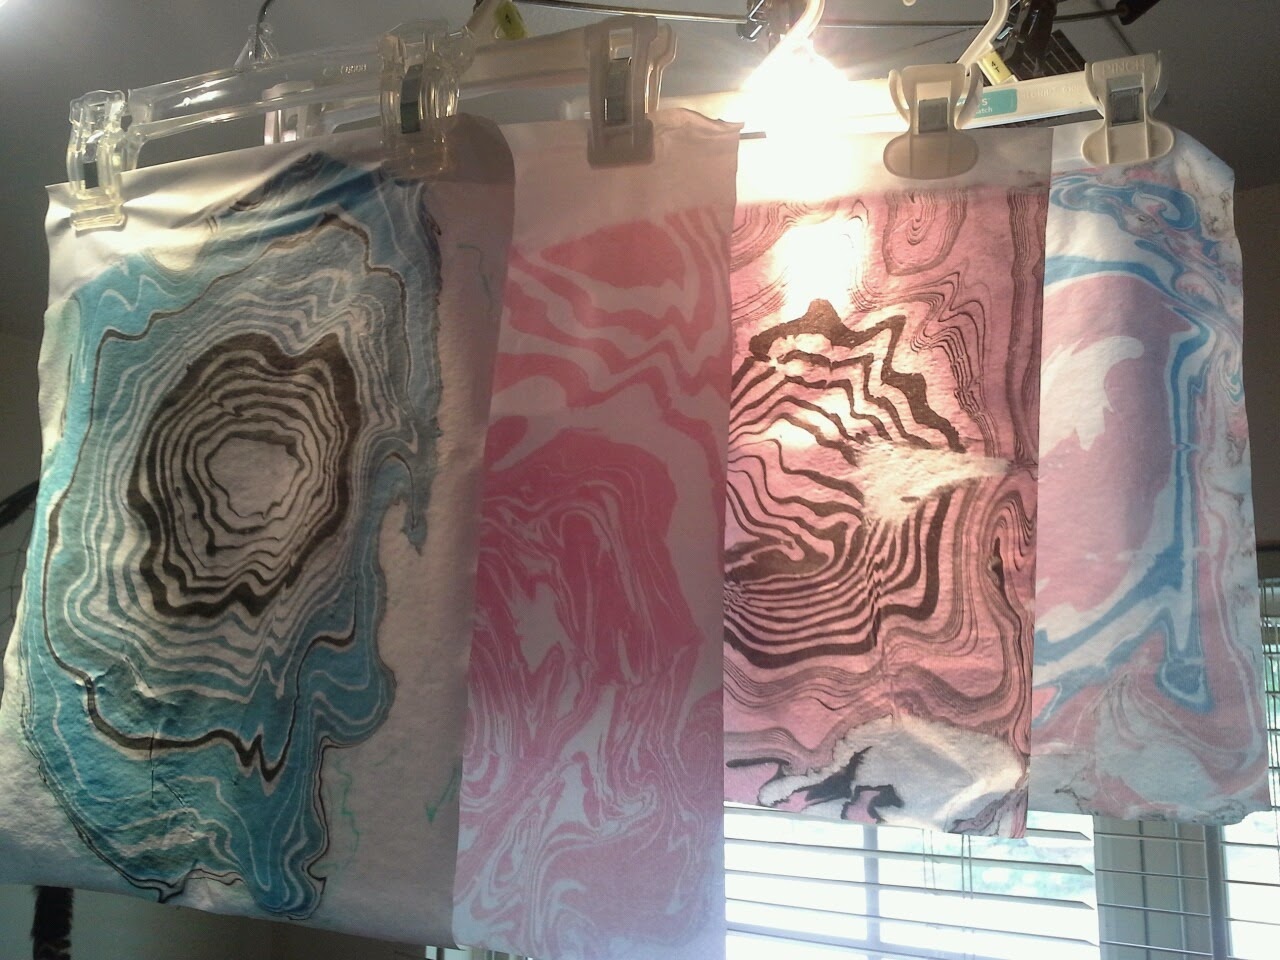
And there you have it! Behold some of the creations Hopewell Branch’s Manga Club members have produced. They had fun experimenting and trying new techniques with each print.

1 "History." Suminagashi. N.p, 1 Nov. 2012. Web. 23 Aug. 2014.
- Anna V.
Second Photo courtesy of Juni Xu
Comments
Post a Comment